Overview
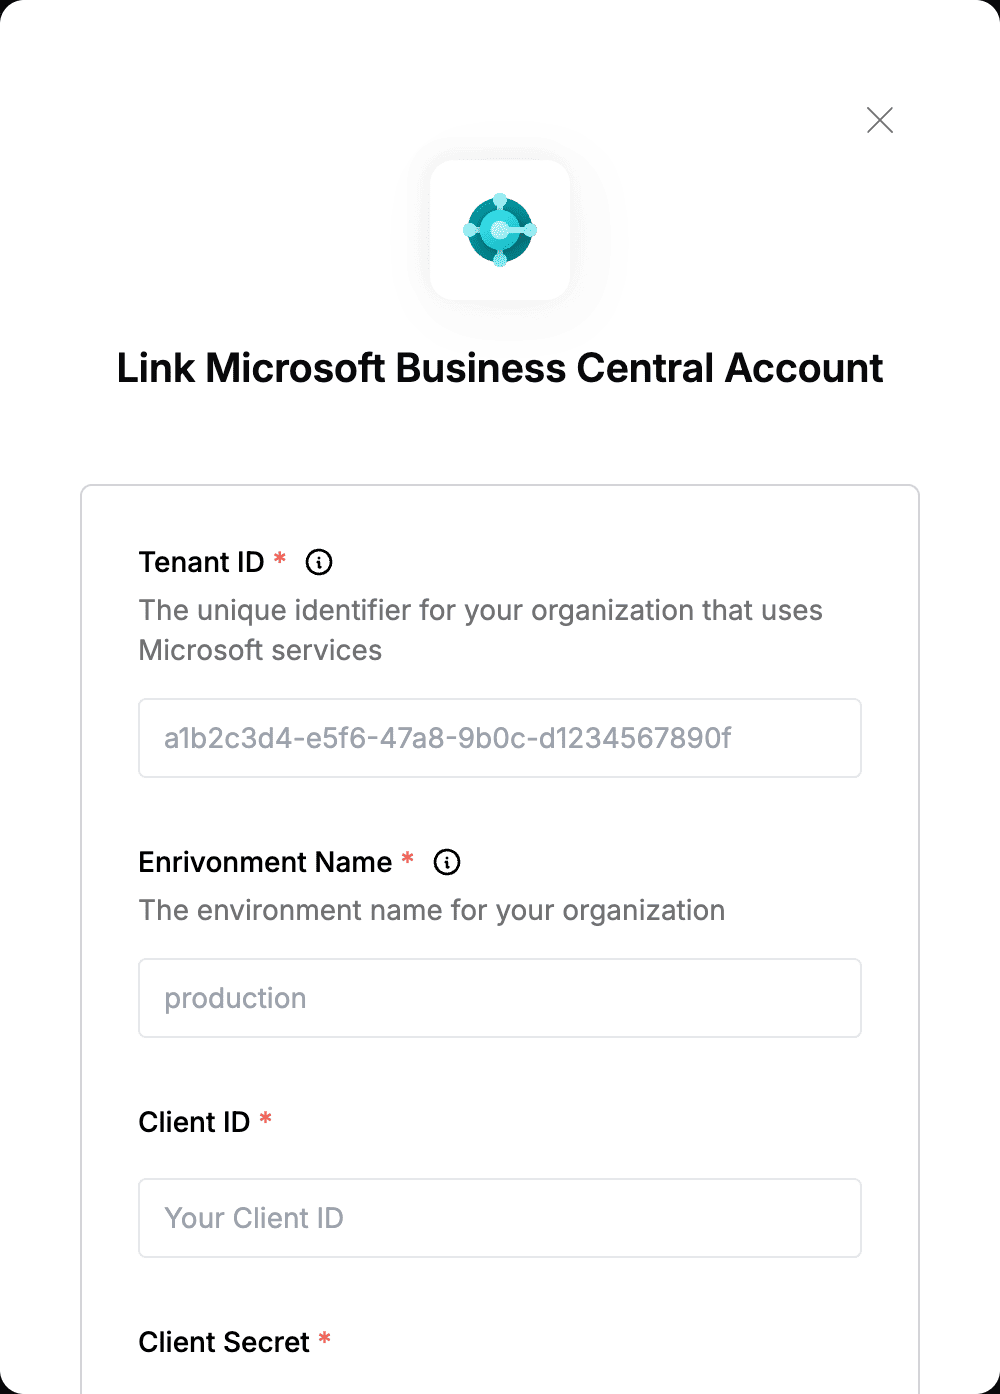
To authenticate with Microsoft Business Central, you need:- Tenant ID - The unique identifier for your organization that uses Microsoft services.
- Enrivonment Name - The environment name to your organization.
- Client ID - The unique identifier that Azure assigns to your application when it’s registered.
- Client Secret - A unique string that enables the client application to access Microsoft Business Central.
Prerequisites:
- You must have an Azure account with an active Microsoft Business Central subscription.
Instructions:
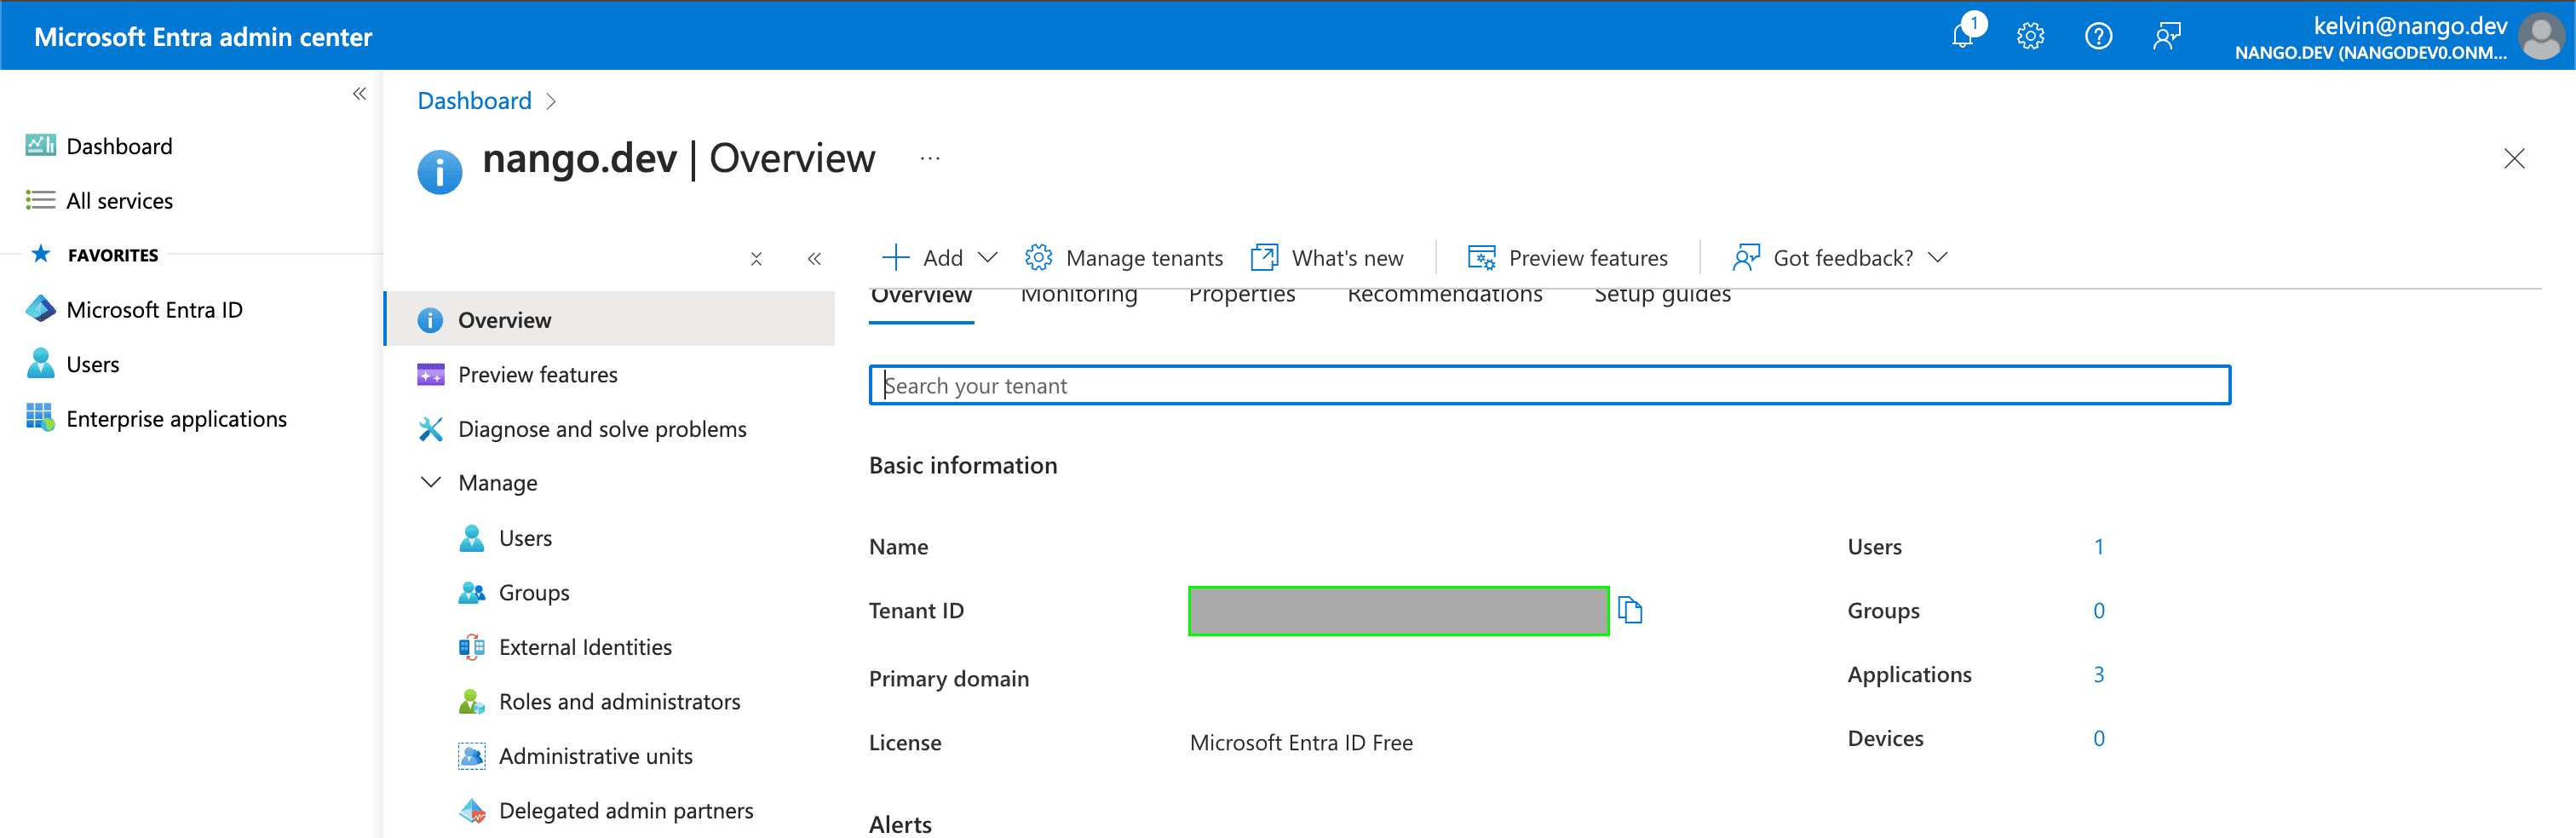
Step 1: Finding your Tenant ID
- Your Tenant ID can be found in the Tenant ID field on the Overview page within your Azure account.
Step 2: Finding your Enrivonment Name
- Your Enrivonment Name can be found in the Environments tab of the Business Central administration center account.
Step 3: Generating your Client ID
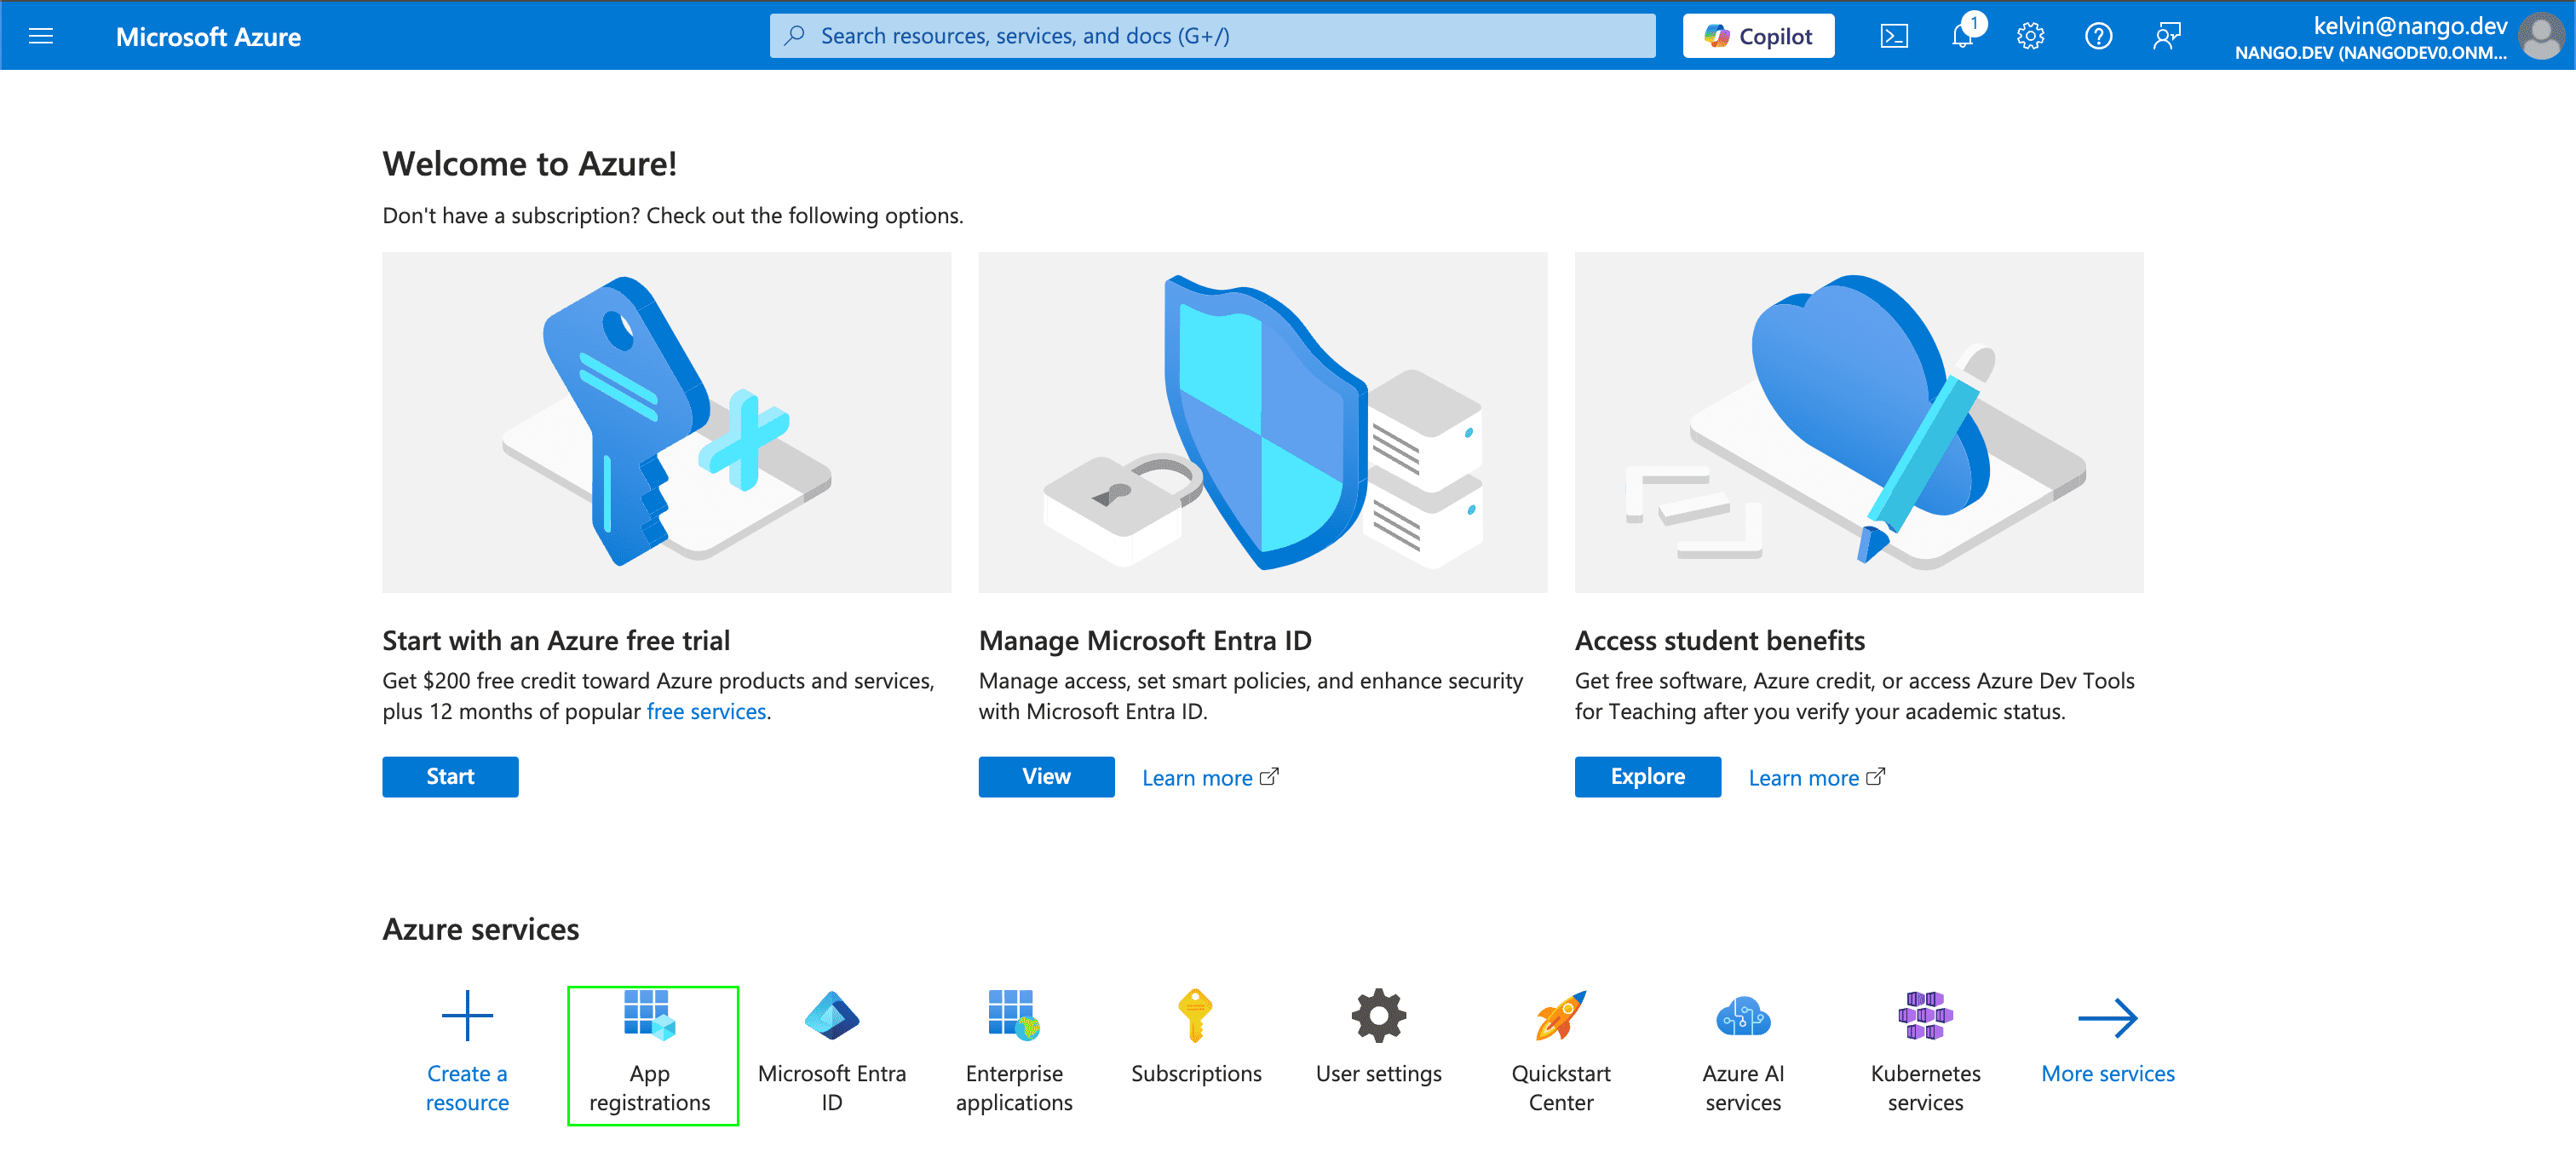
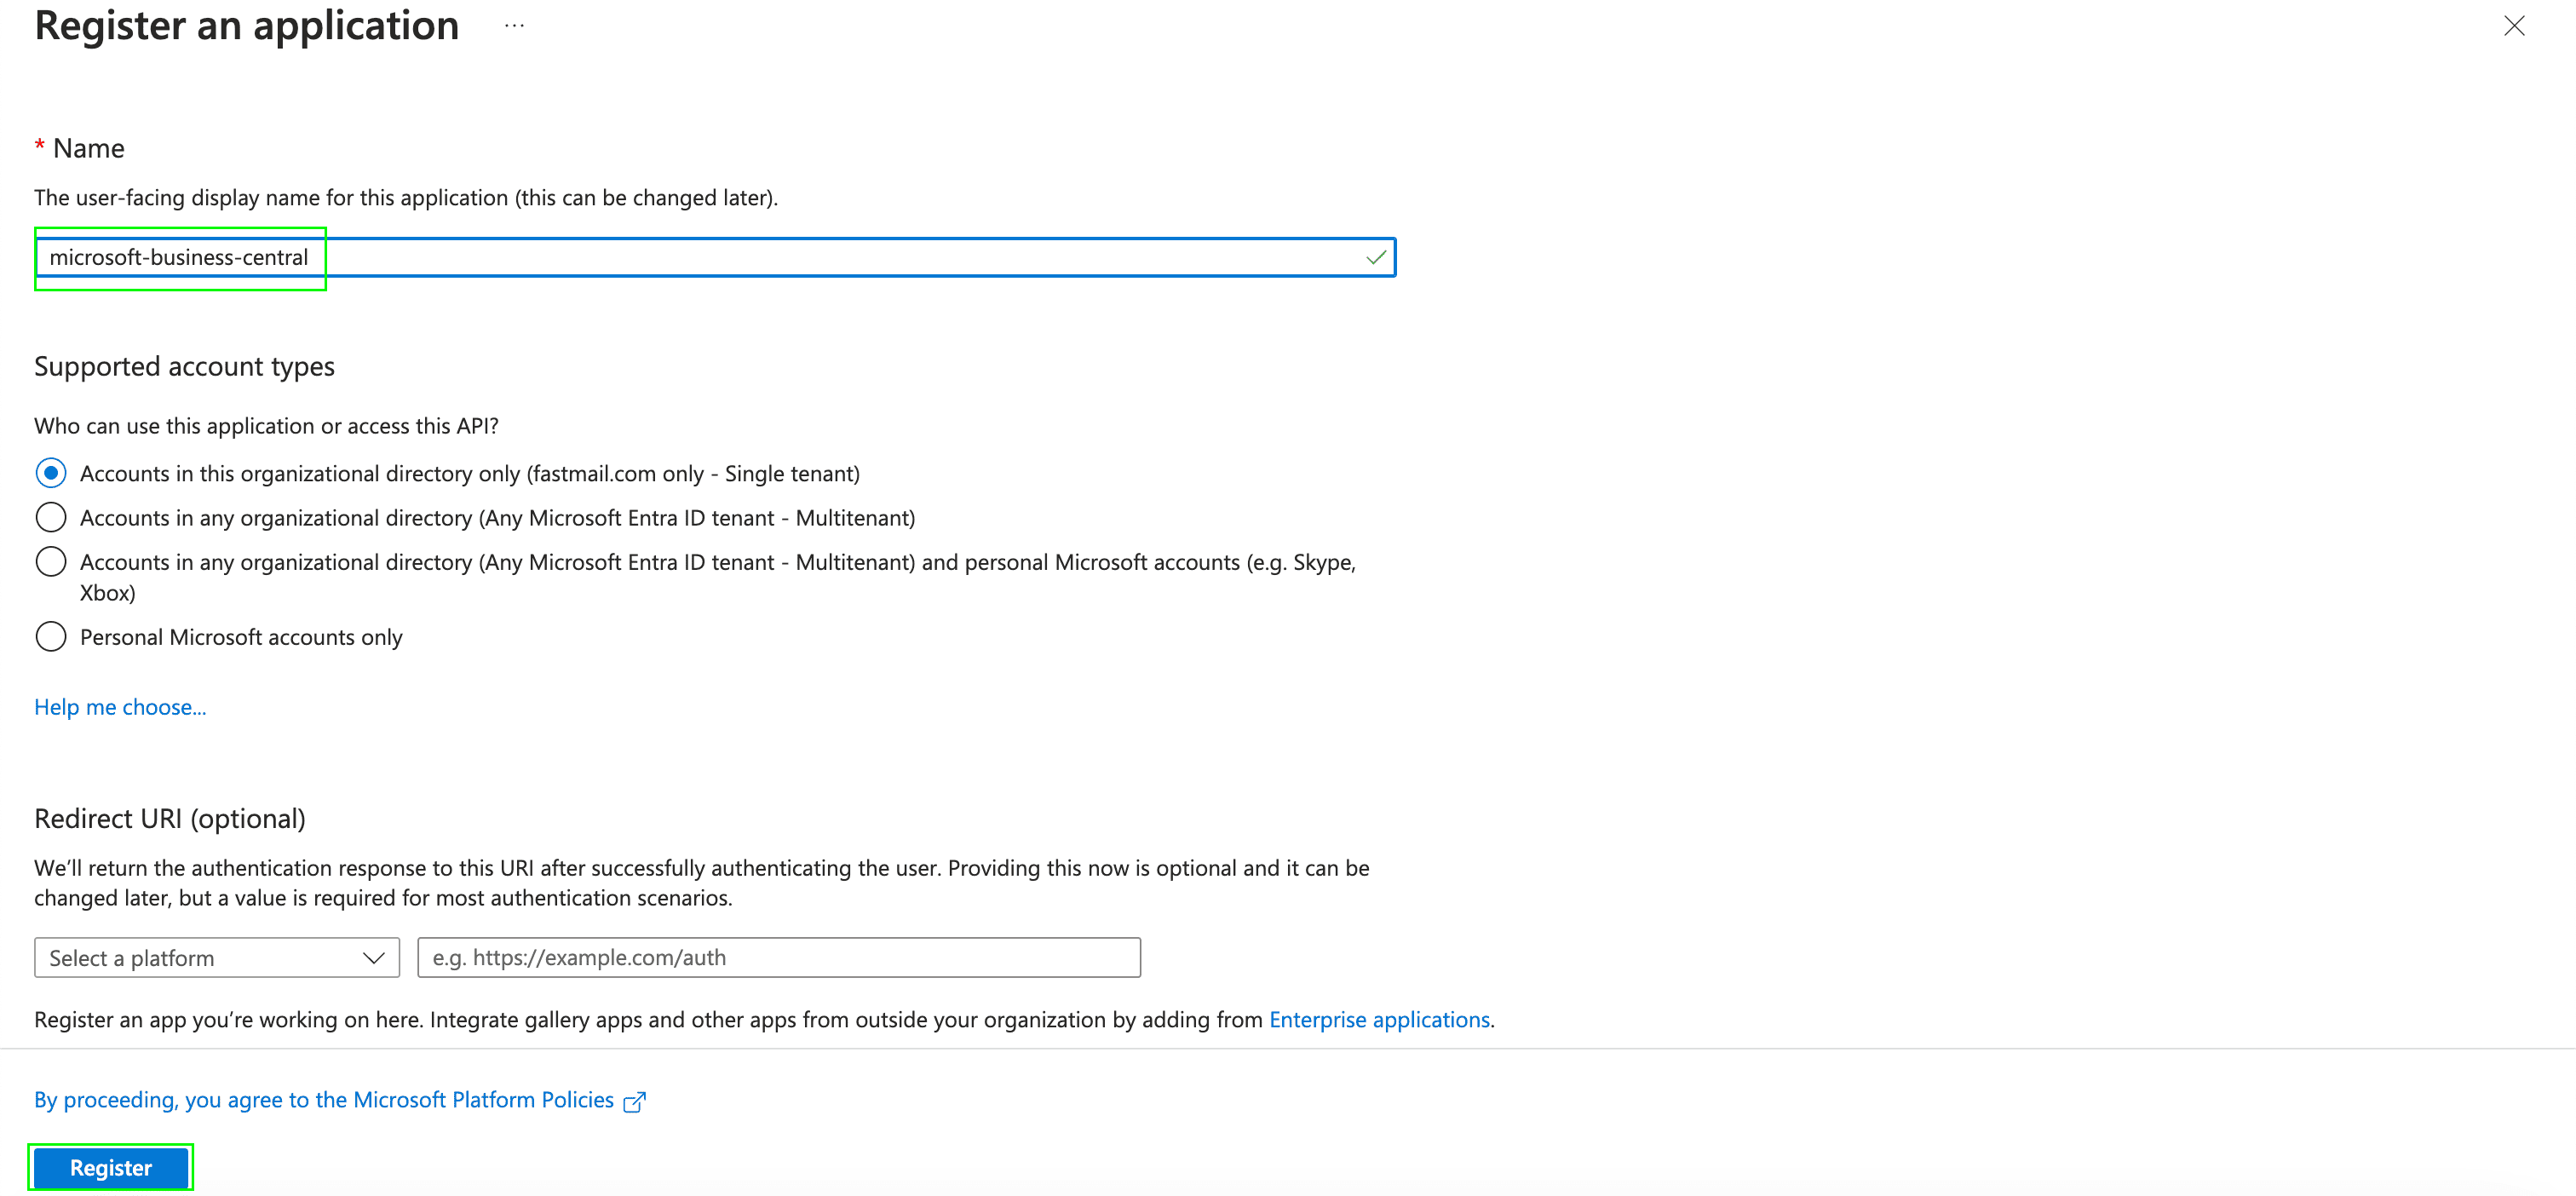
- Navigate to the Azure portal home page and sign in using the credentials of an administrator.
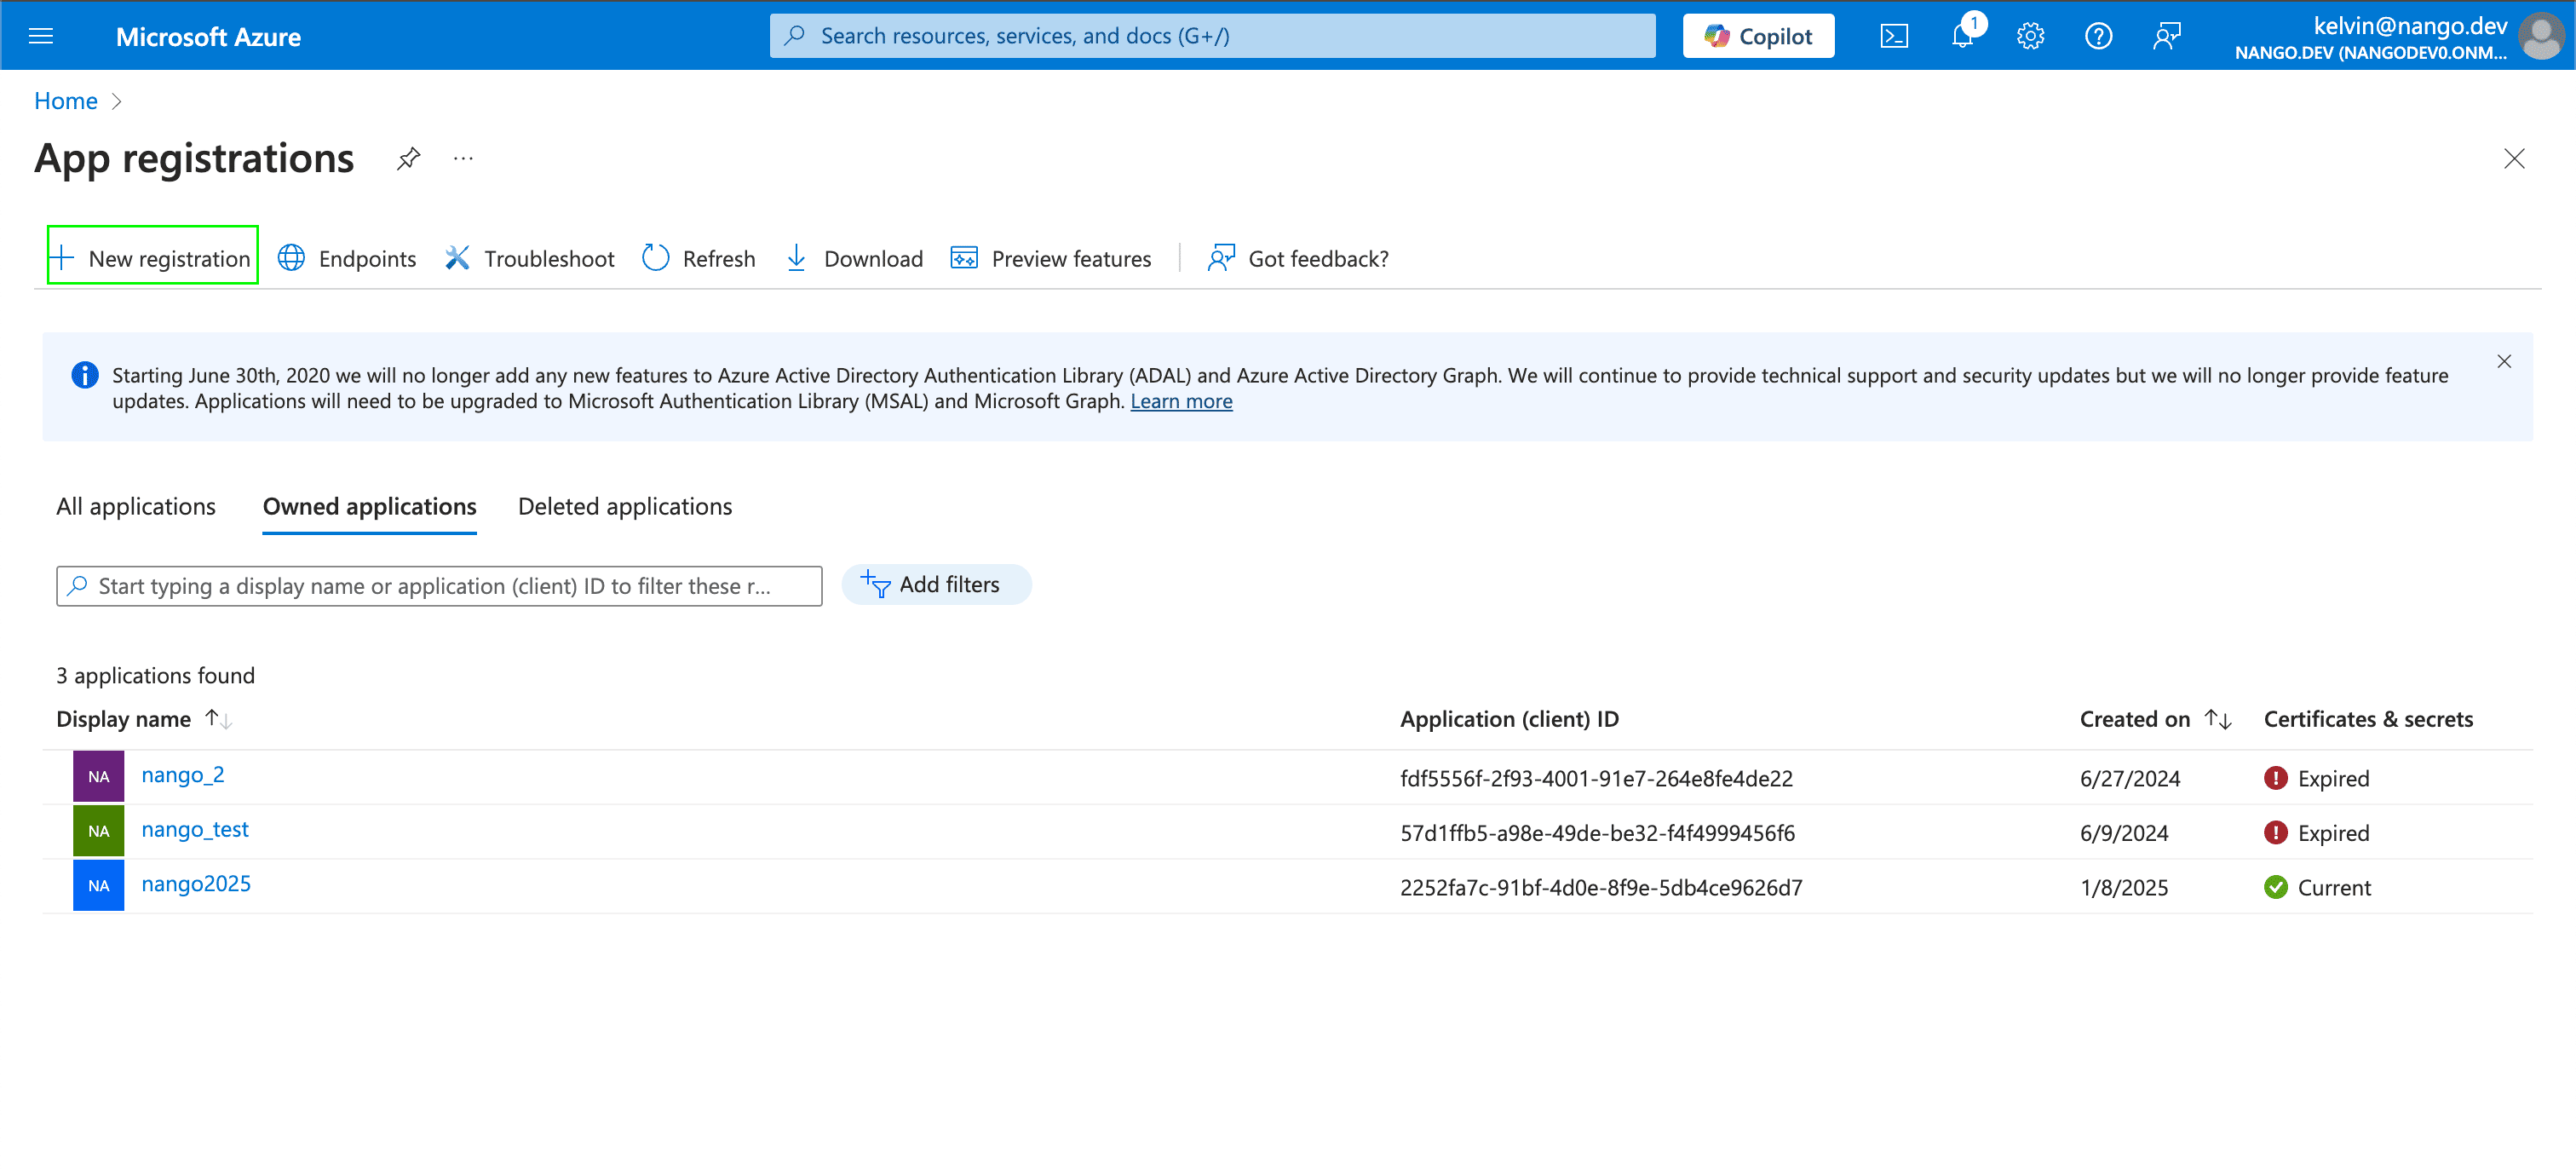
- Select App registrations.
- Select New registration.
- In the Register an application section, enter a meaningful application name to display to users. Select who can use this application based on your environment and click Register.
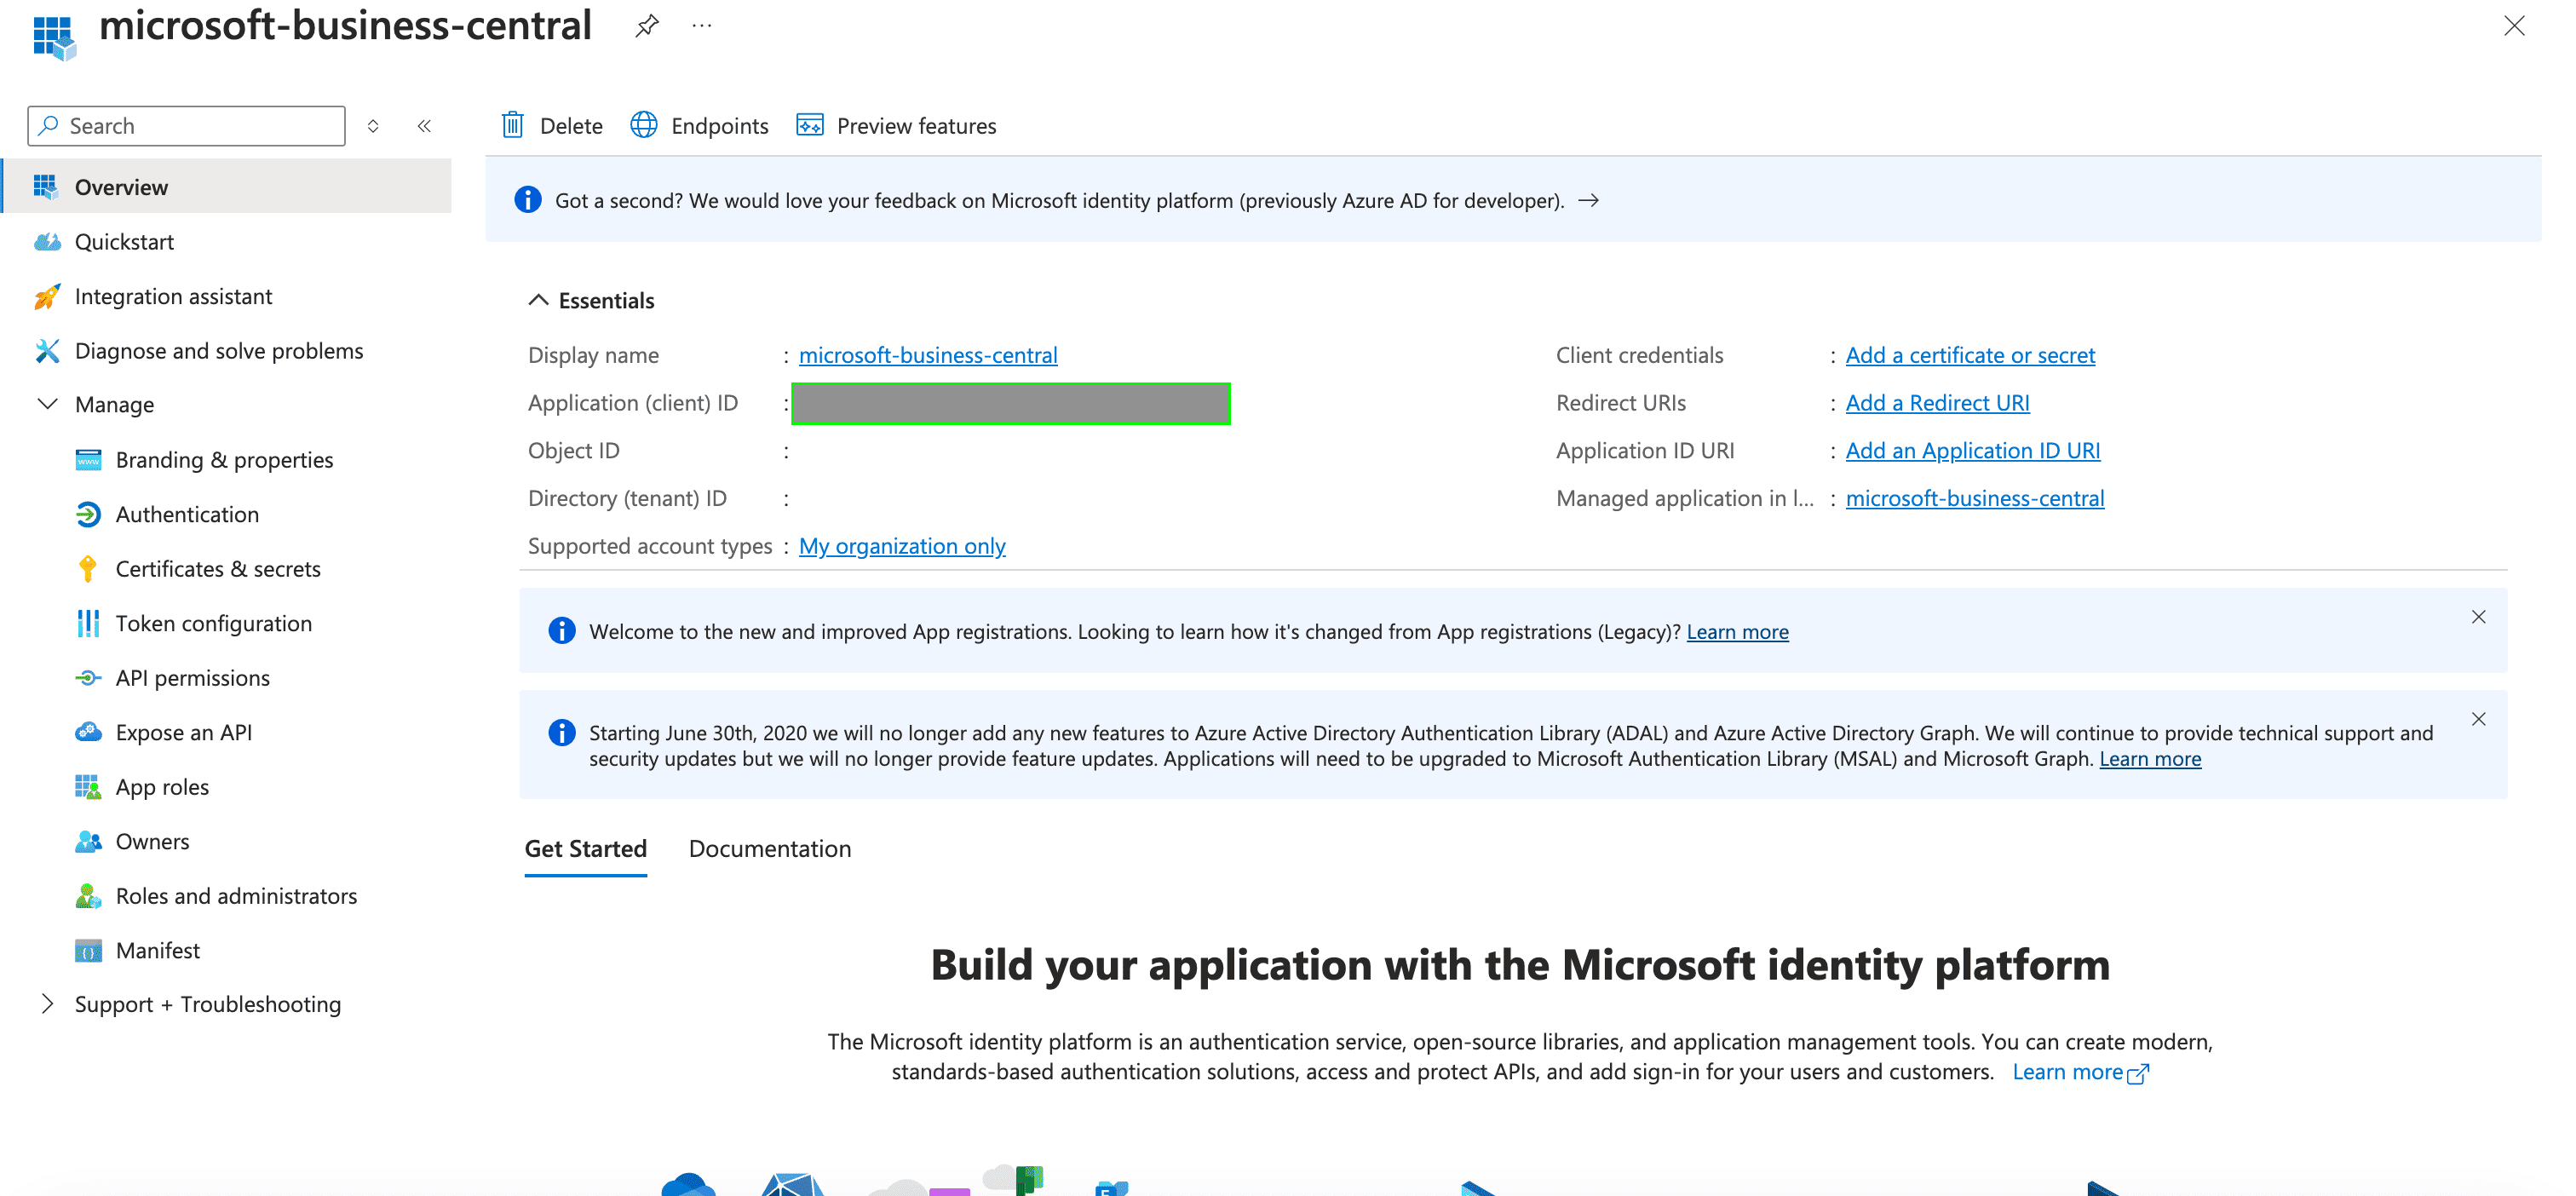
- Once you have registered your application, your Client ID will be displayed in the Application (client) ID field within the Essentials.
- Go to Authentication, click Add a platform, and select Web.
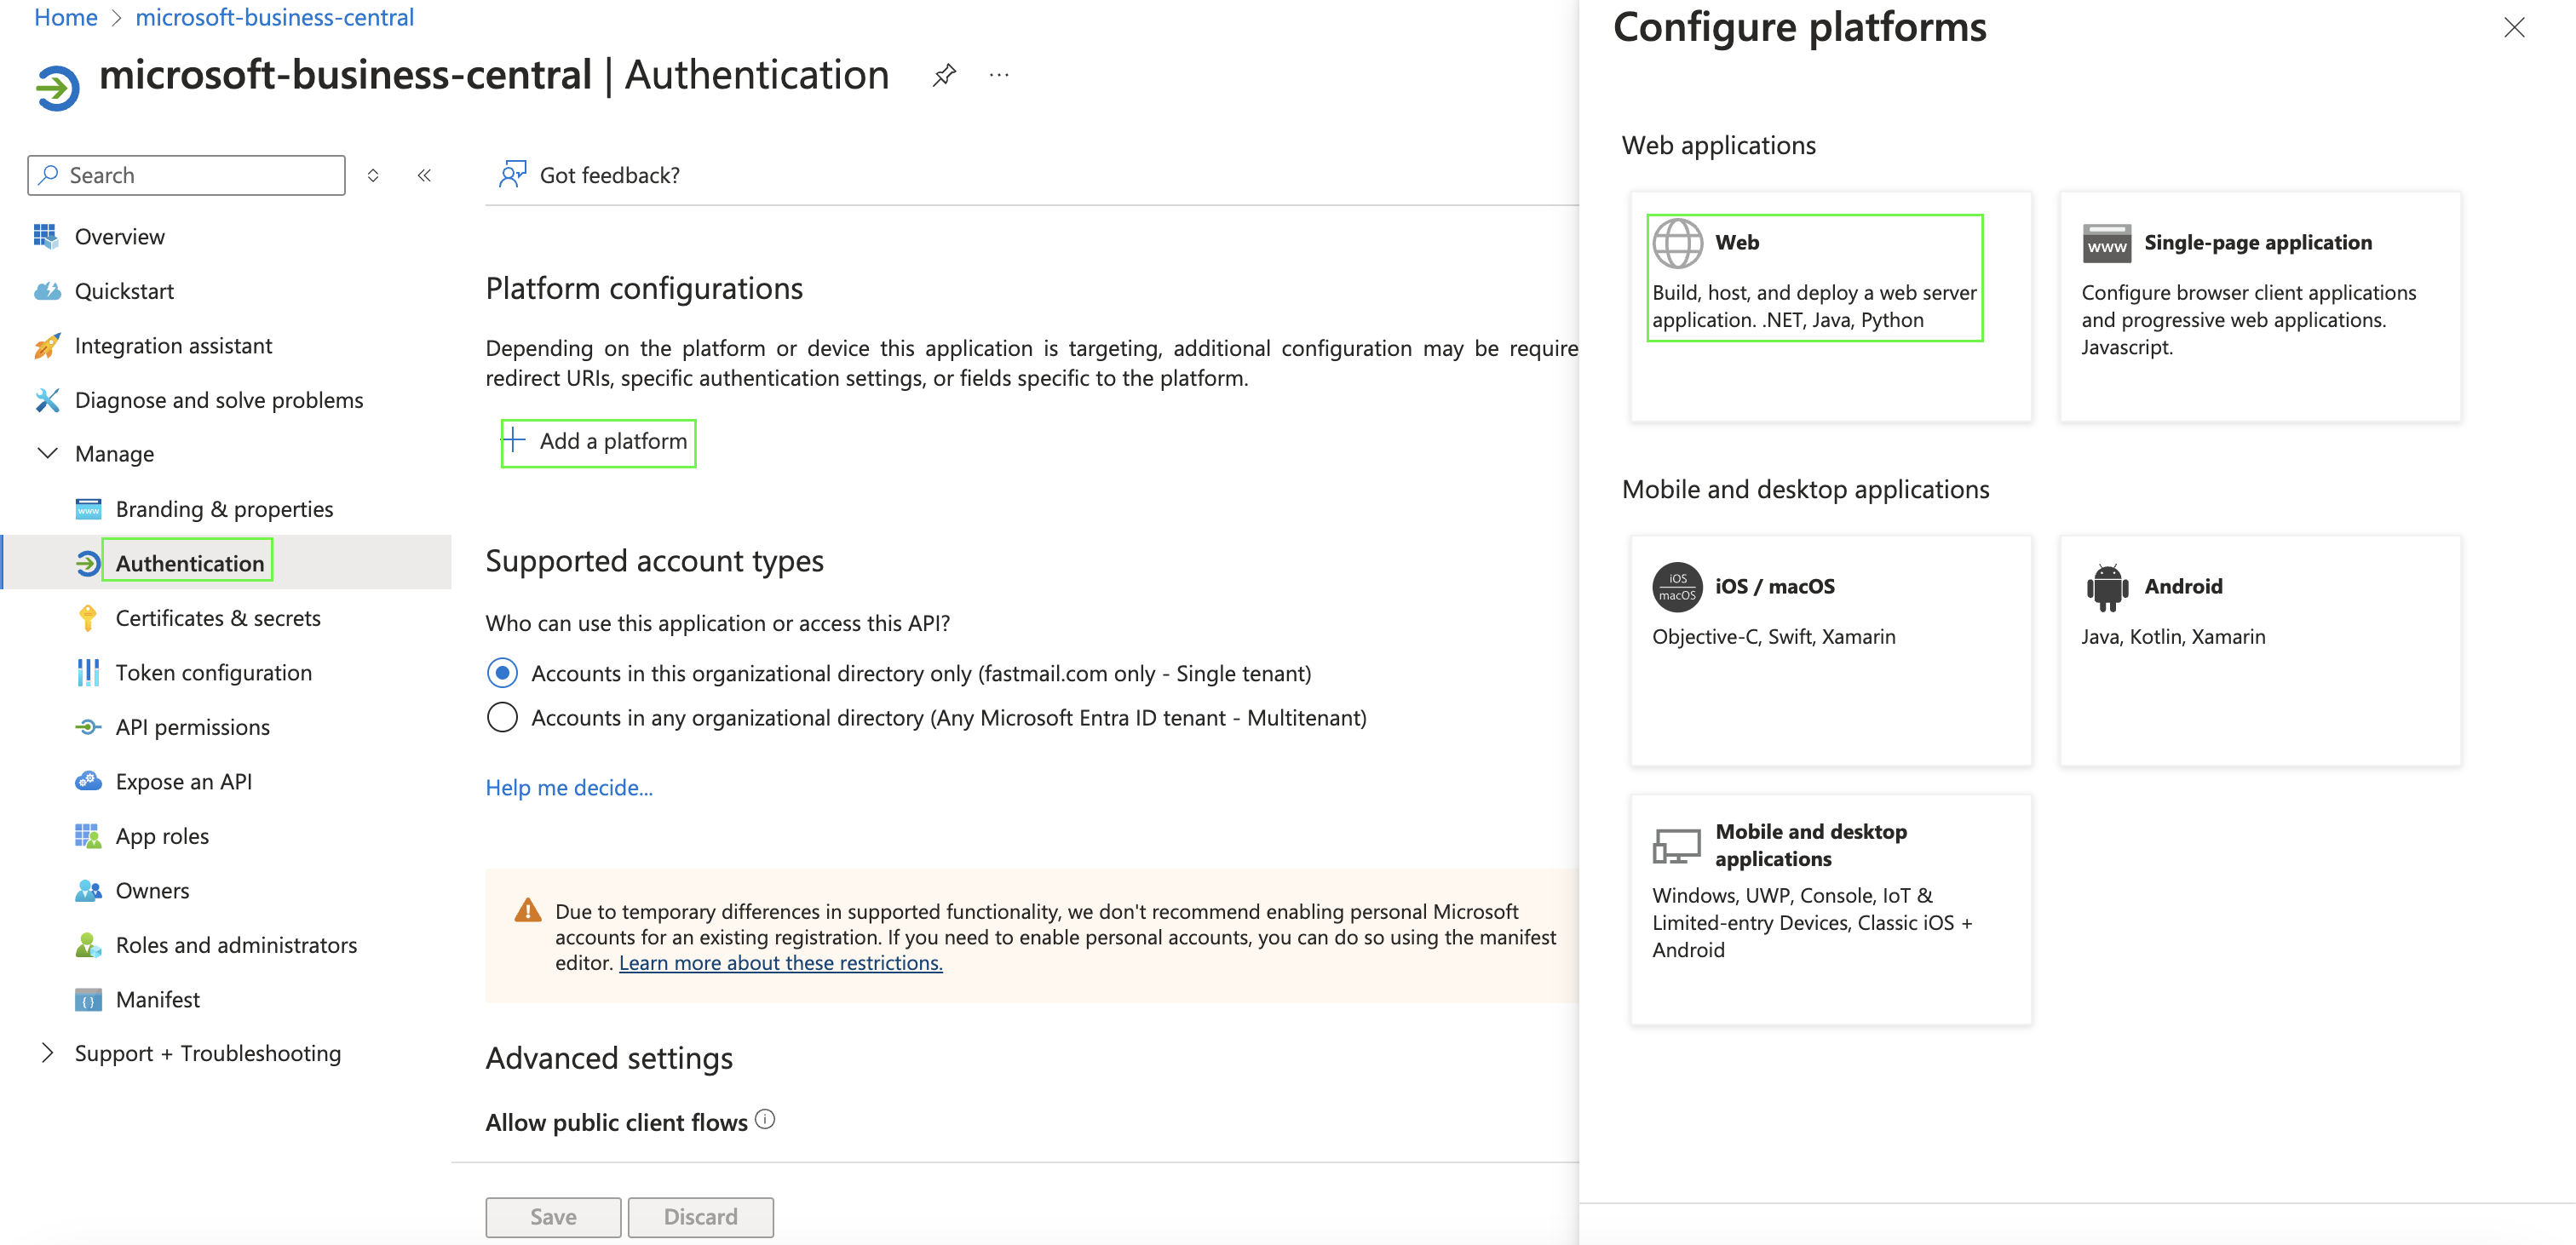
- Set the redirect URI: https://businesscentral.dynamics.com/OAuthLanding.htm, then click Configure.
Step 4: Generating your Client Secret
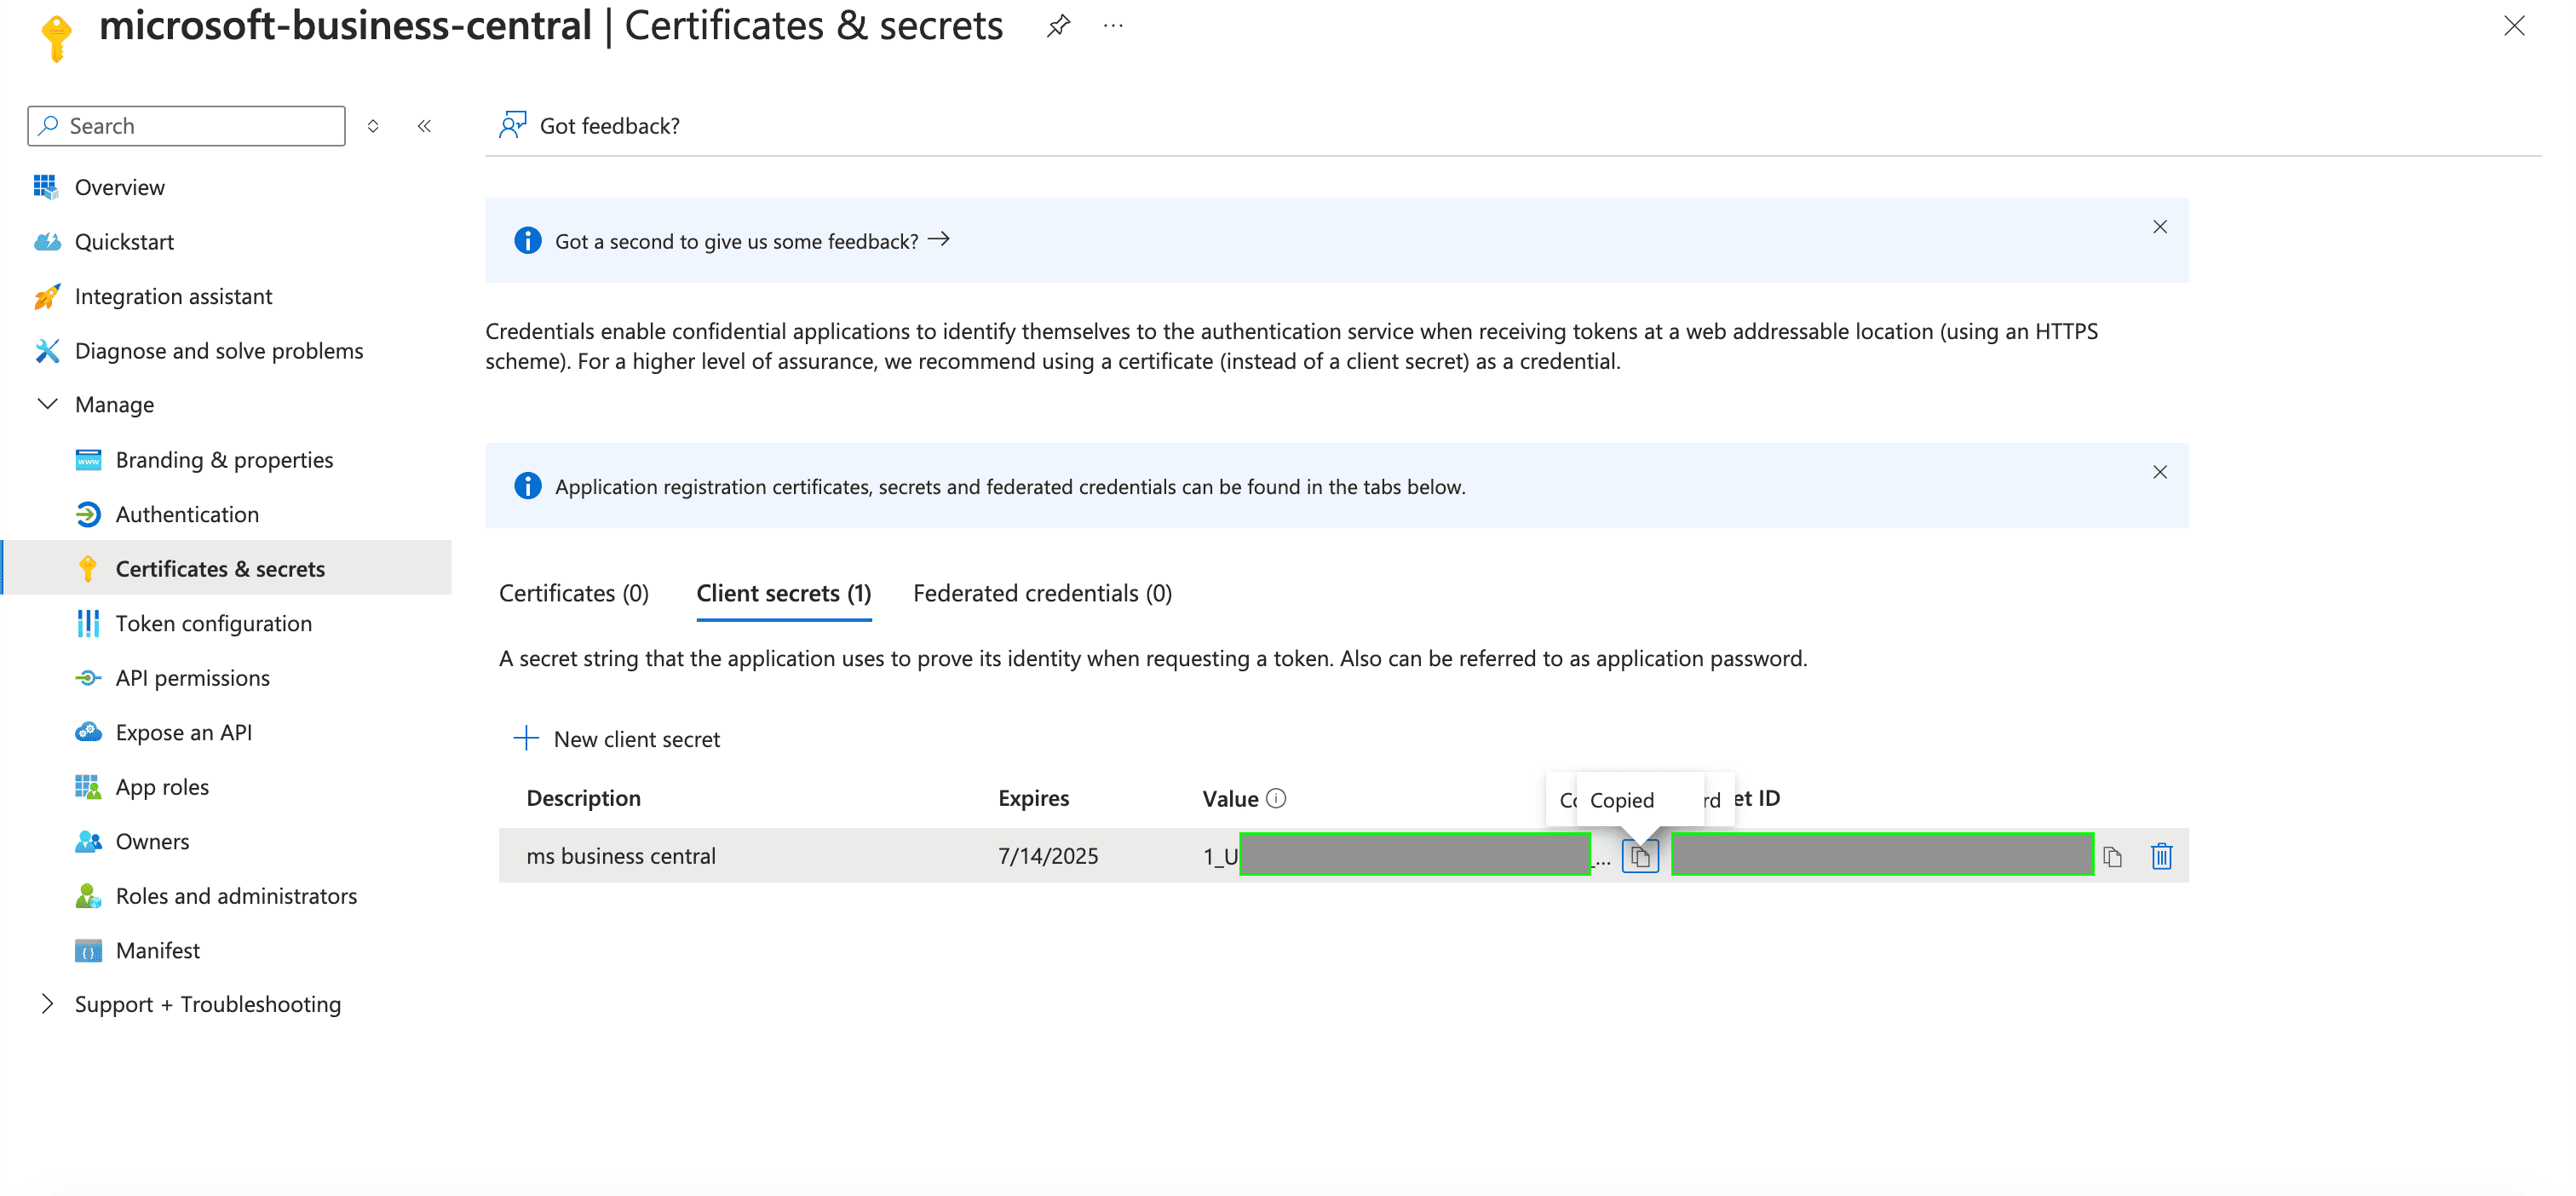
- After registering a new app in the step above, you can now generate a client secret for that specific application. Navigate to Certificates & secrets under Manage, and click New client secret.
- A pop-up modal will appear, prompting you to enter your secret’s Description and Expires values. Fill these then click on Add.
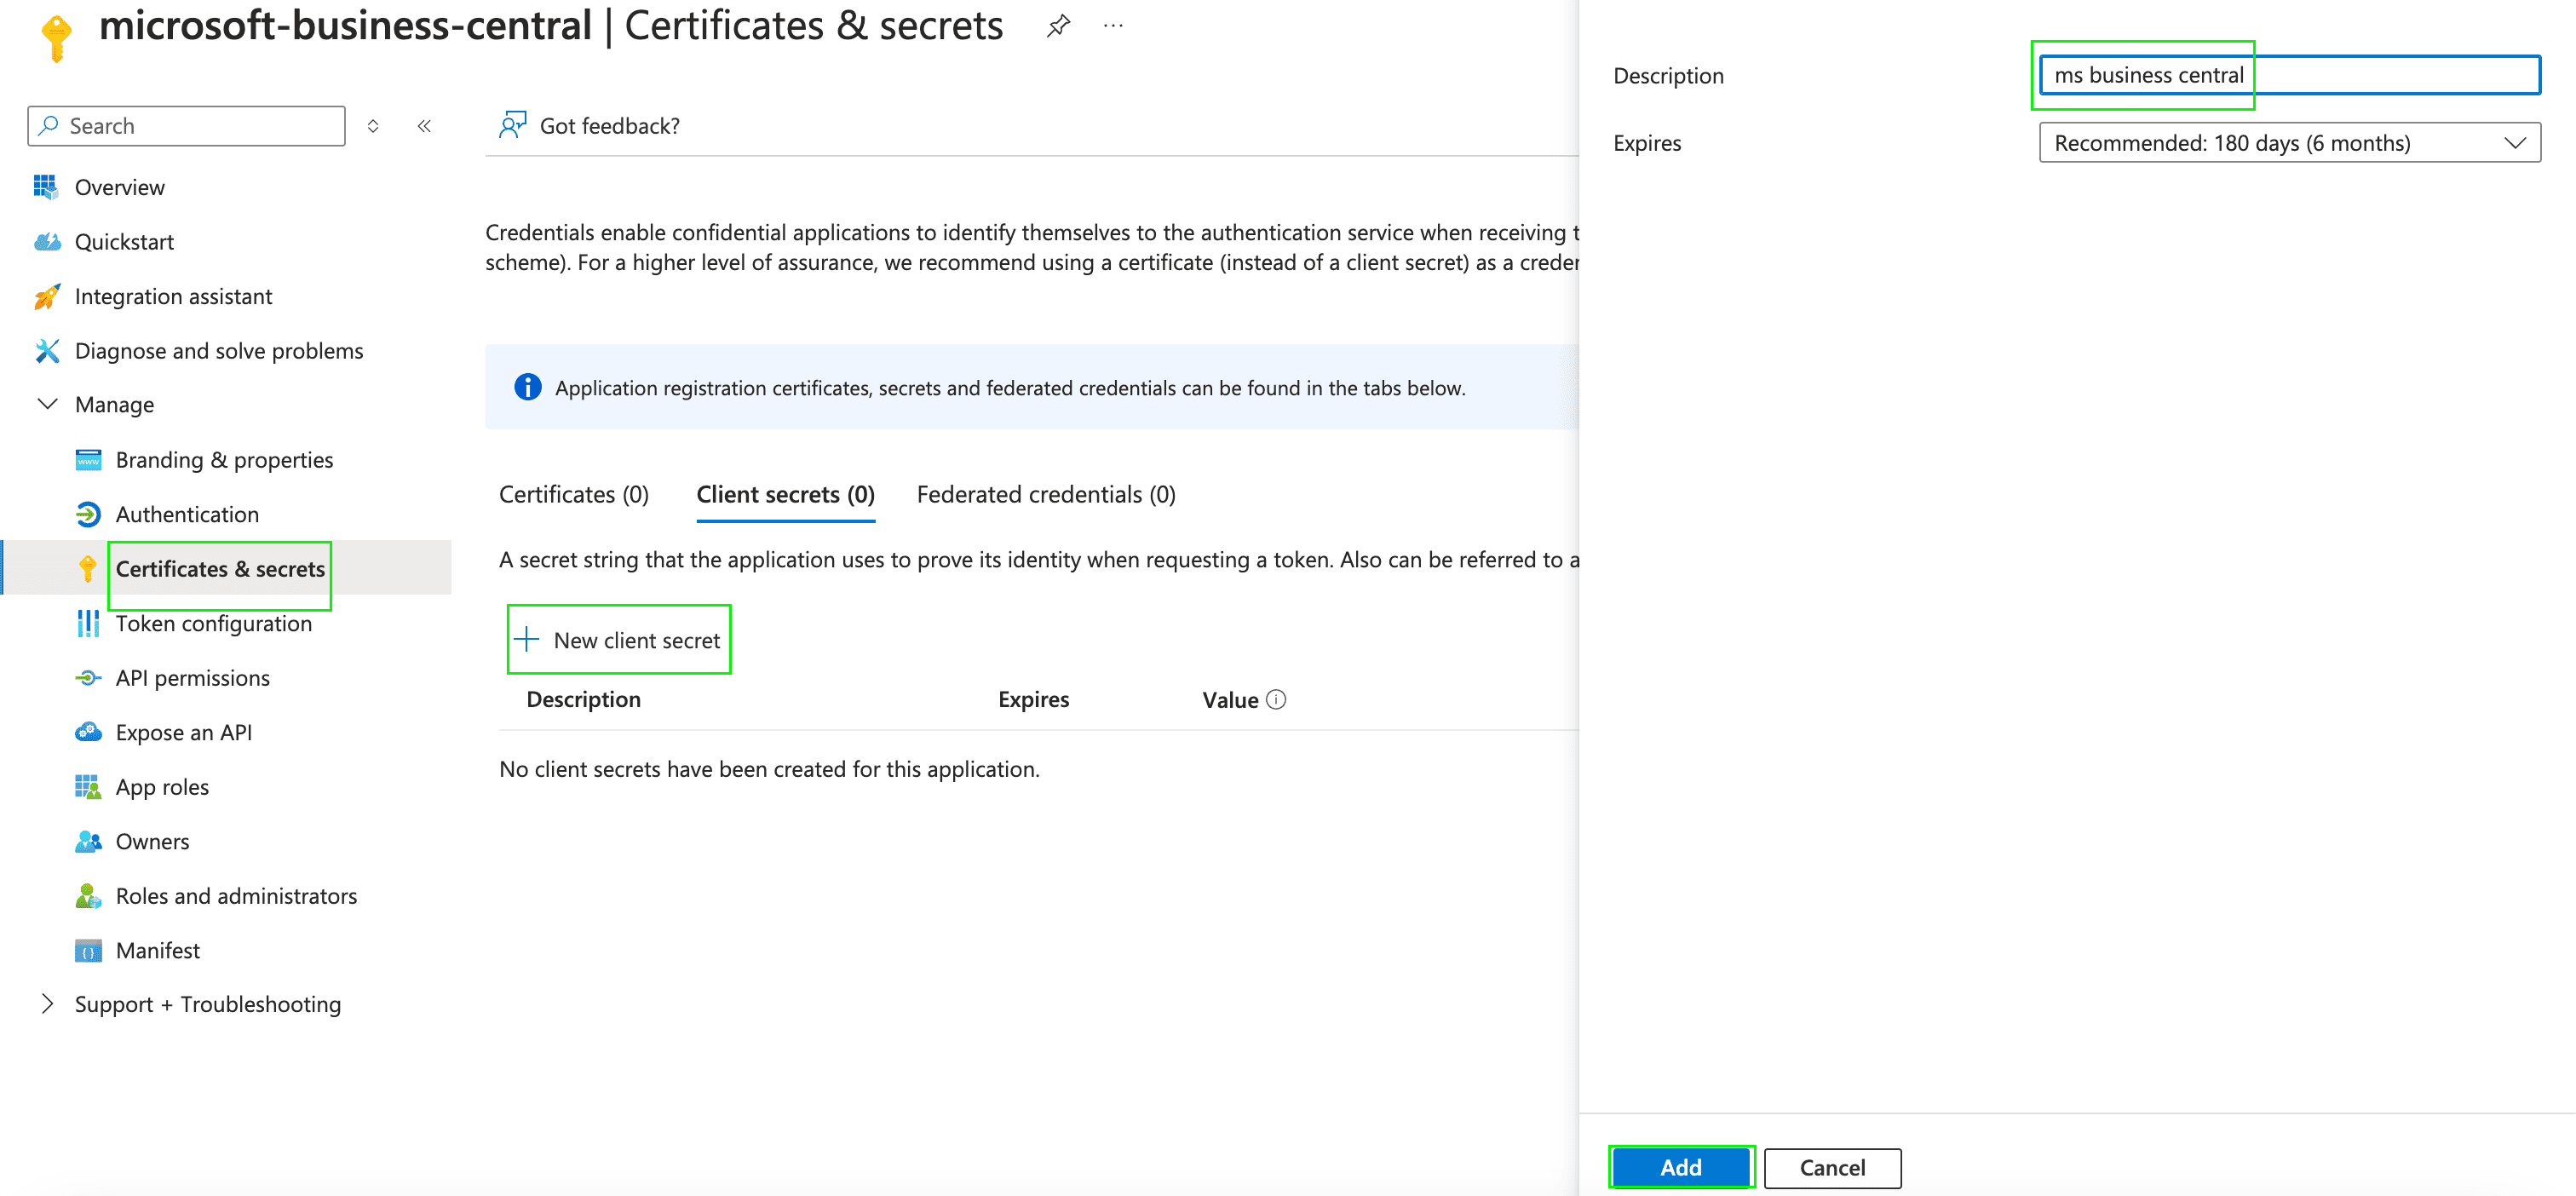
- Once completed, your Client Secret will be generated. This value can be found in the Value field within the Client Secrets table.
- After generating the Client Secret, you must grant the registered application the necessary permissions for Dynamics 365 Business Central. To do this, navigate to API permissions, select Add a permission, and choose Dynamics 365 Business Central.
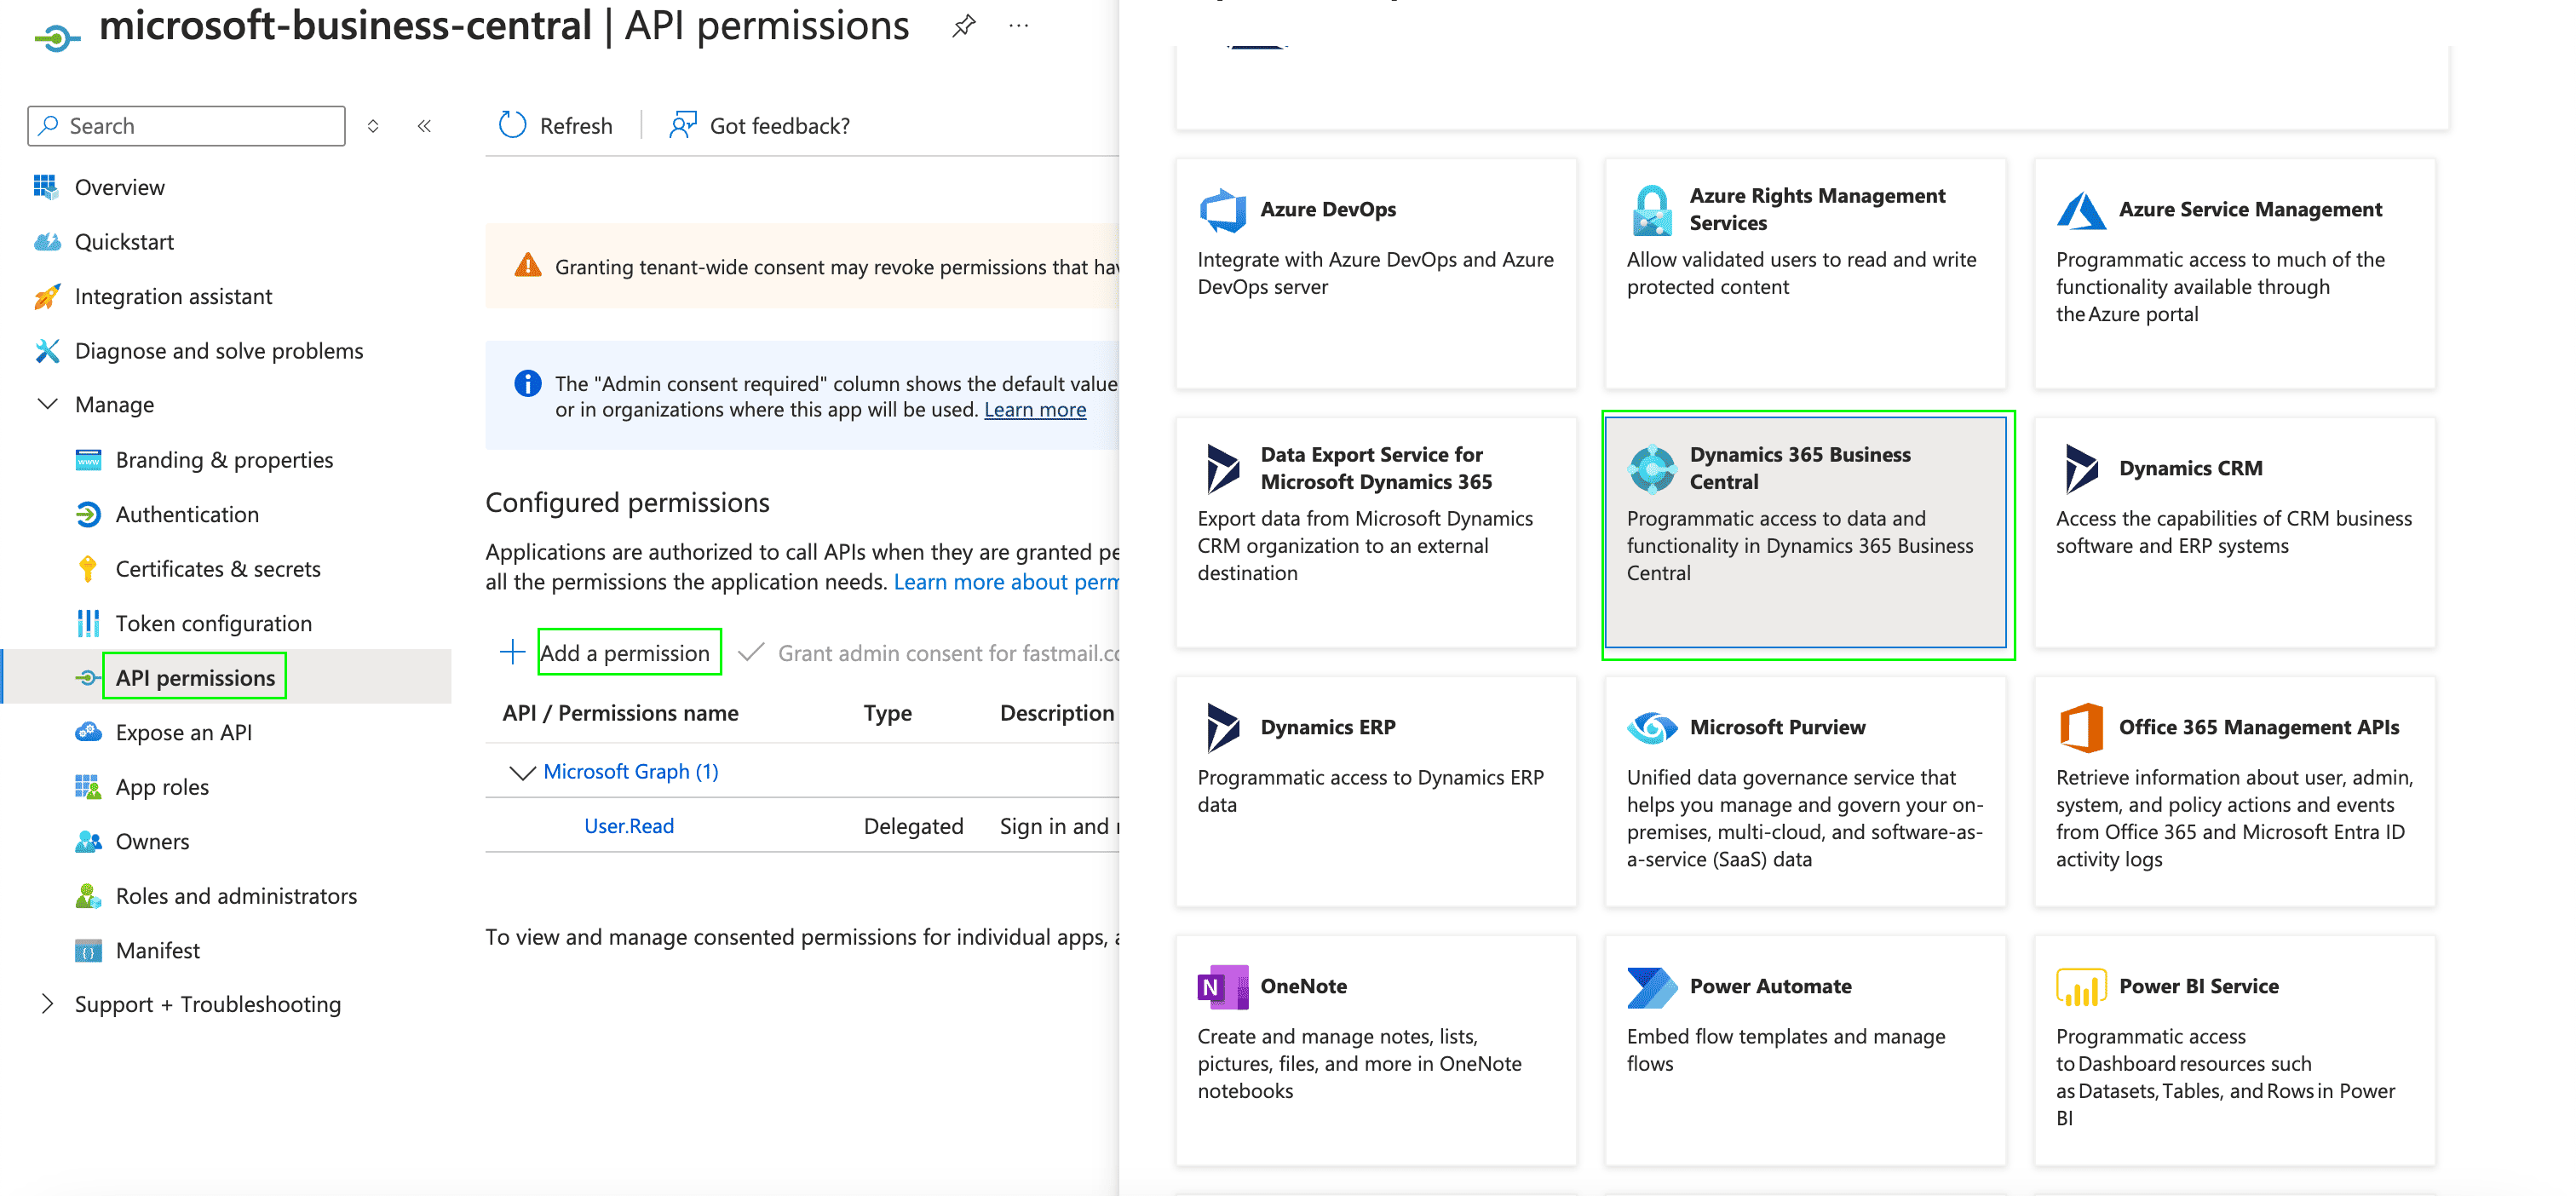
- Select Application permissions, choose the required permissions, and then click Add permissions.
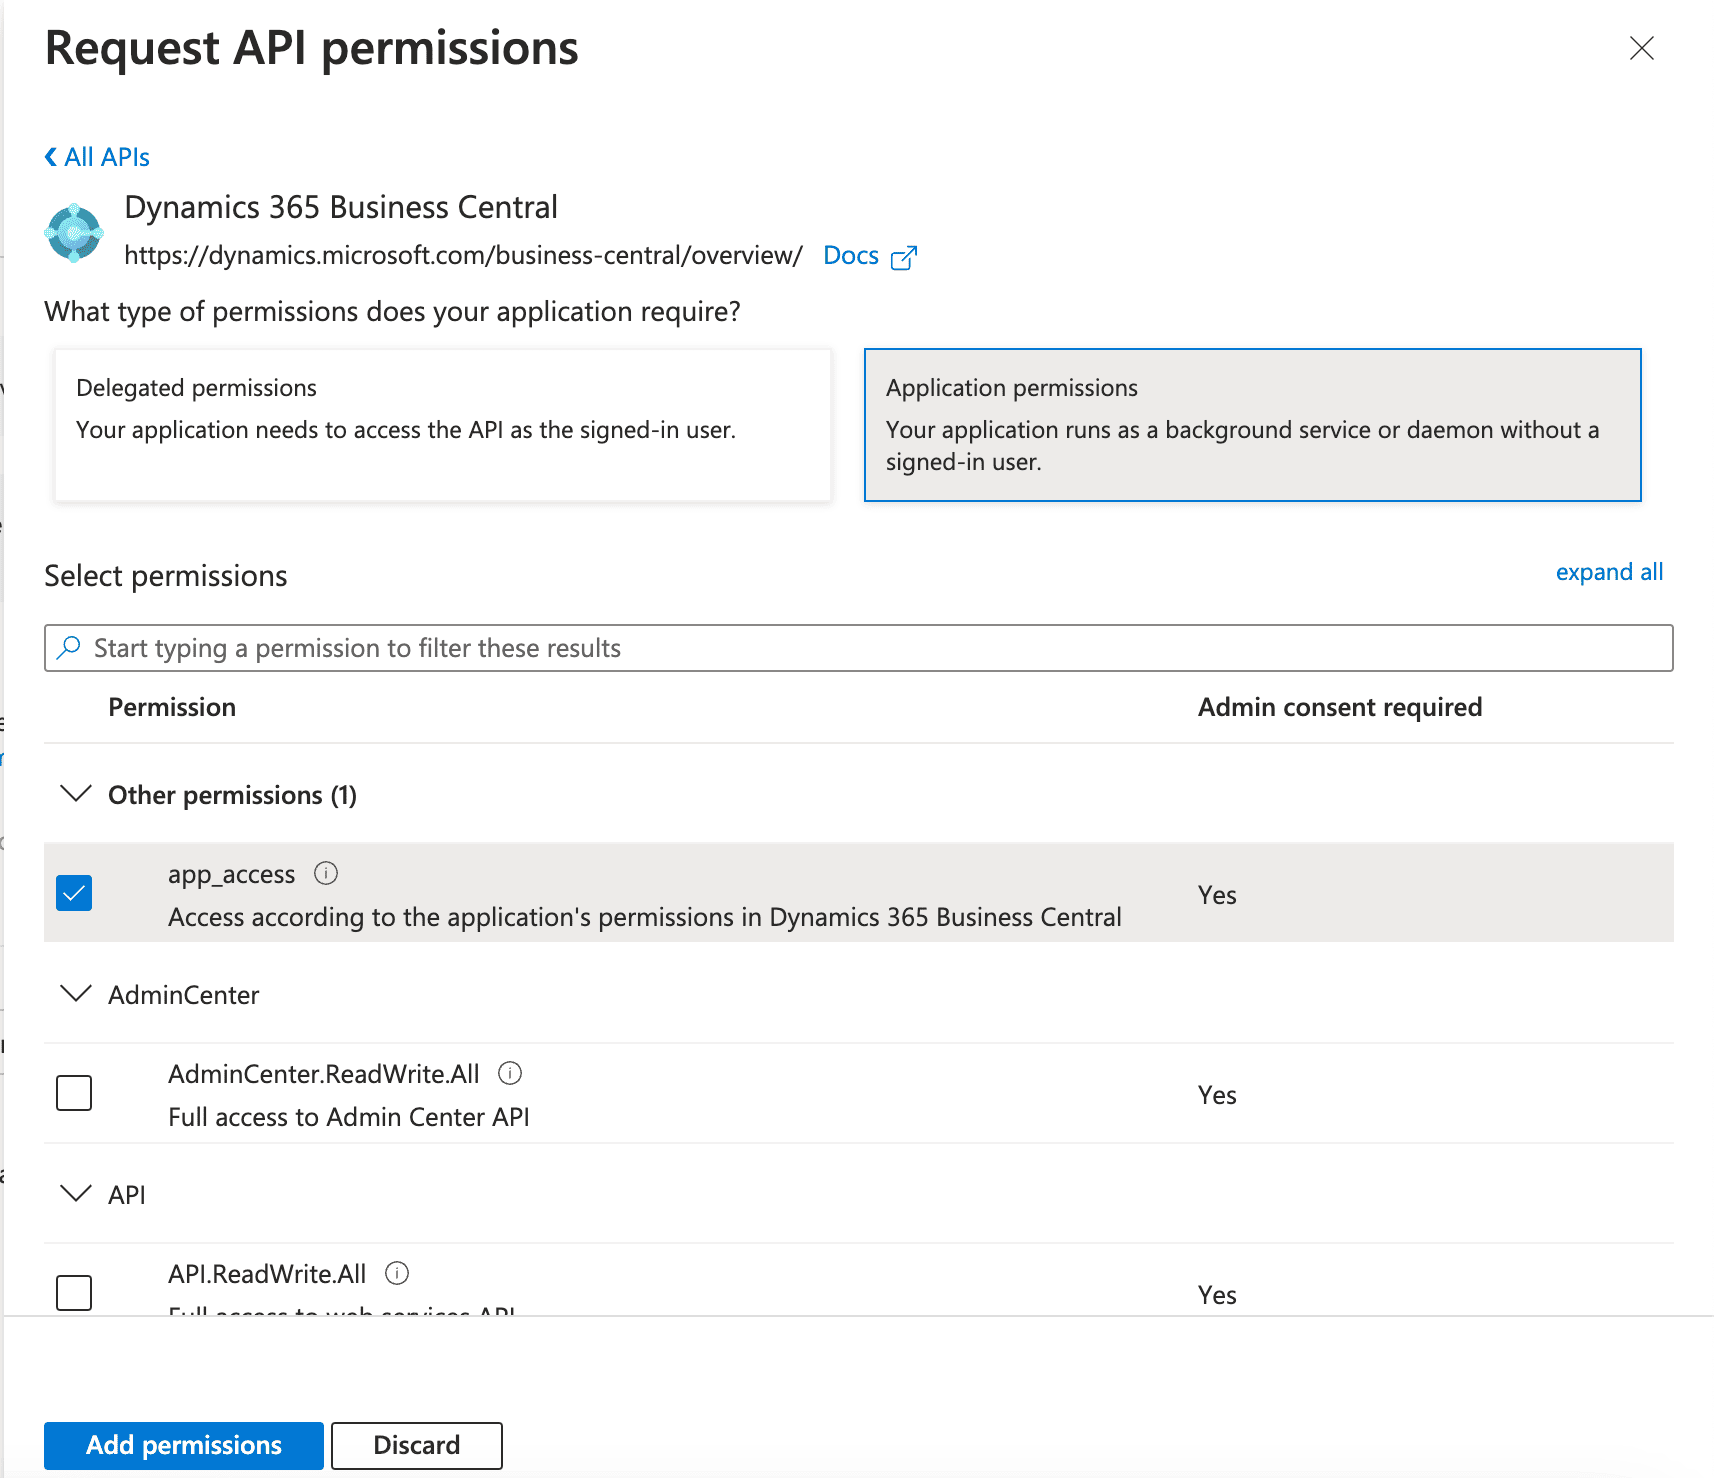
- Grant admin consent for the selected permission by choosing it from the list and then clicking Grant admin consent for your specific tenant name.
- After setting up the app above, we need to Configure service-to-service authentication for the Azure AD application in Business Central.
- Login to your Business Central client, search for Microsoft Entra Applications, open the page, and click New.
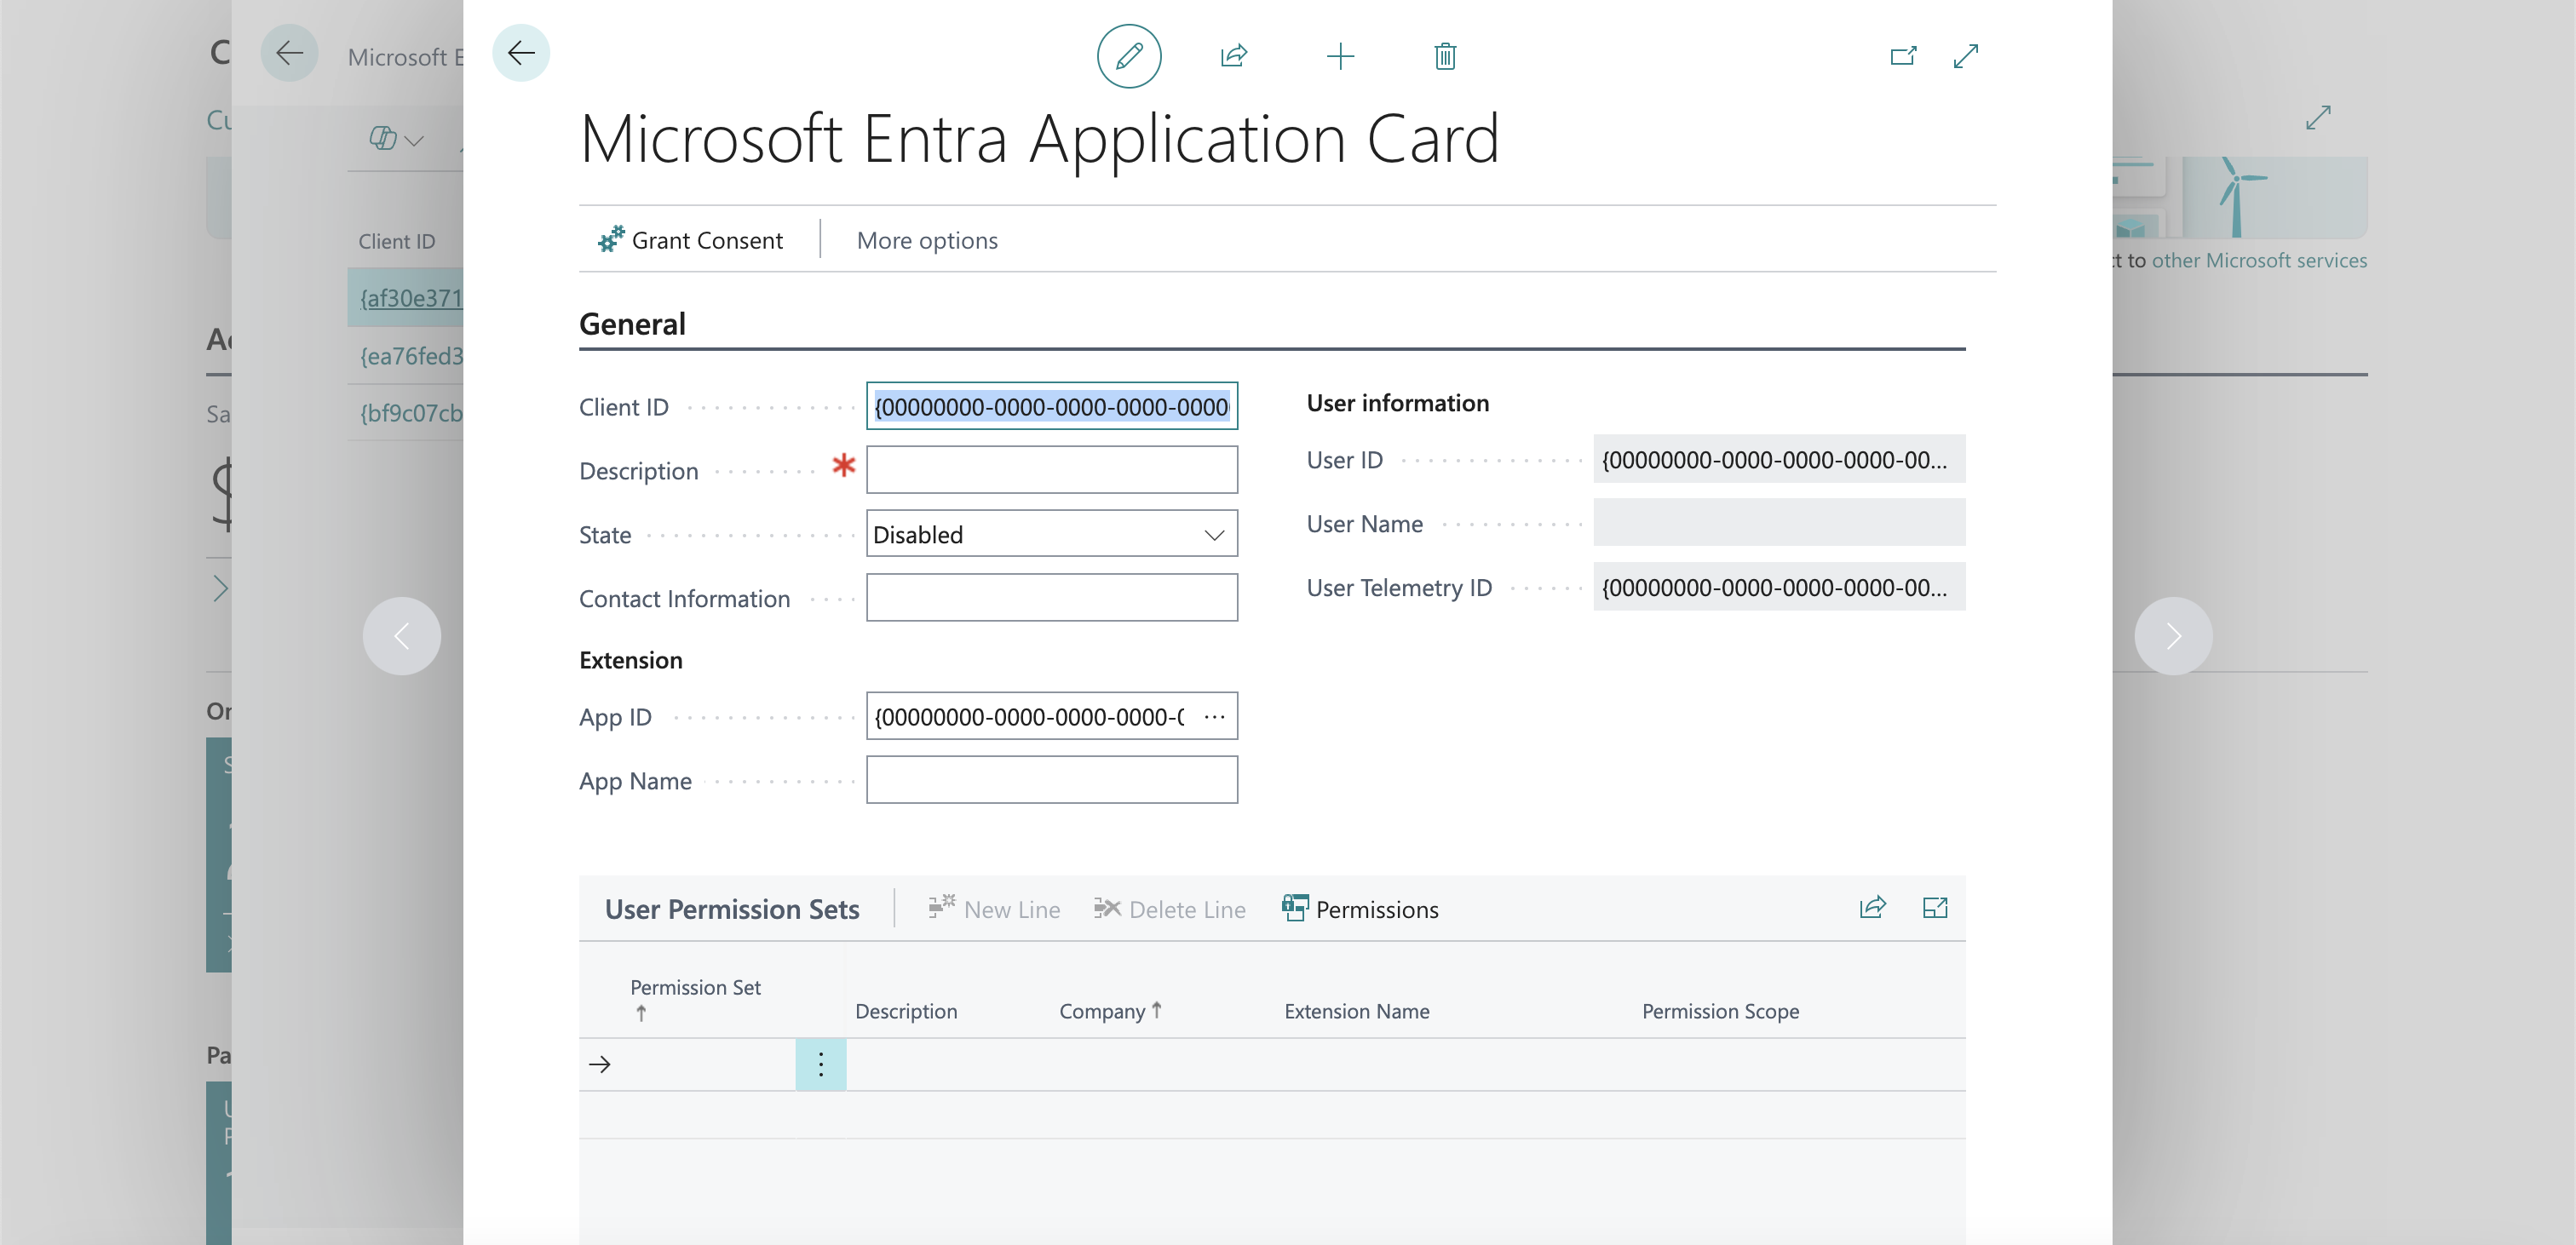
- In the opened screen, enter the Application (Client) ID to the Client ID field. This is the Azure AD application ID that you obtained at step 2 above.
- Fill in the Description field. If this application is set up by a partner, please enter sufficient partner-identifying information, so that all applications set up by this partner can be tracked in the future.
- Set the State to Enabled.
- Give a permission set or assign a user group.
- (Optional) - If you didn´t grant admin consent from Azure you can do it here as well by selecting Grant Consent.

- Open the form where you need to authenticate with Microsoft Business Central.
- Enter the Tenant ID, Enrivonment Name, Client ID and Client Secret in their designated fields.
- Submit the form, and you should be successfully authenticated.